I took Redshift Serverless for a spin — here’s what I found

Amazon Redshift Serverless became generally available in July 2022. I was excited to see this release since I had been mentioning this capability to clients in my previous consulting role since the public preview announcement last November. Broadly speaking, a serverless-based approach to computing is considered cloud-native and eliminates the need for users of computing resources to get involved in provisioning and ongoing management of the compute infrastructure, effectively reducing infrastructure effort.
In the case of Redshift Serverless, as a data analyst, data engineer, analytics engineer, data scientist or virtually any data professional, data products and data applications across multiple data workloads can be developed, built and run without the need or overhead to design, provision, and manage data warehouse clusters. This is an impactful option for everyone in the AWS data ecosystem and delivers a simple, fast, and operationally sustainable way to deliver data outcomes.
I’ll give you my perspective and first impression after recently taking Redshift Serverless for a hands-on spin.
[CTA_MODULE]
A personal tour of Redshift Serverless
To give you a sense of the hands-on tour that I took comparing a provisioned Redshift cluster to Redshift Serverless, I’ll touch on some of the key points in the AWS feature list documentation (with a few detours) and add in a lot of screenshots that will help you understand the capabilities of Redshift Serverless.
Let’s get started
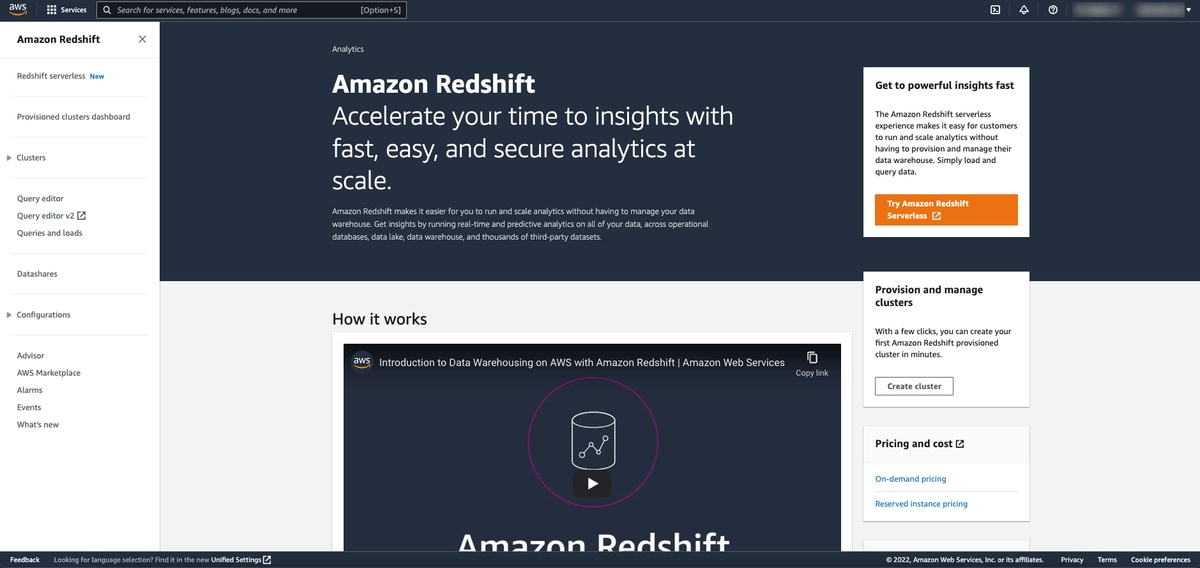
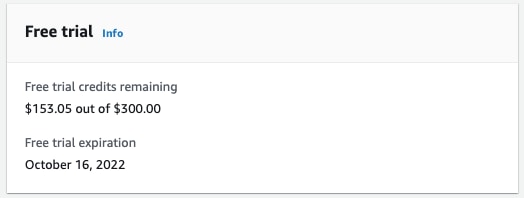
Getting started with Redshift Serverless is quick and easy and comes with $300 in free trial credits. From the Redshift service, choose Redshift Serverless on the upper left side.
I suggest using the default settings because these can always be changed later. The prompts are quick and easy to go through.
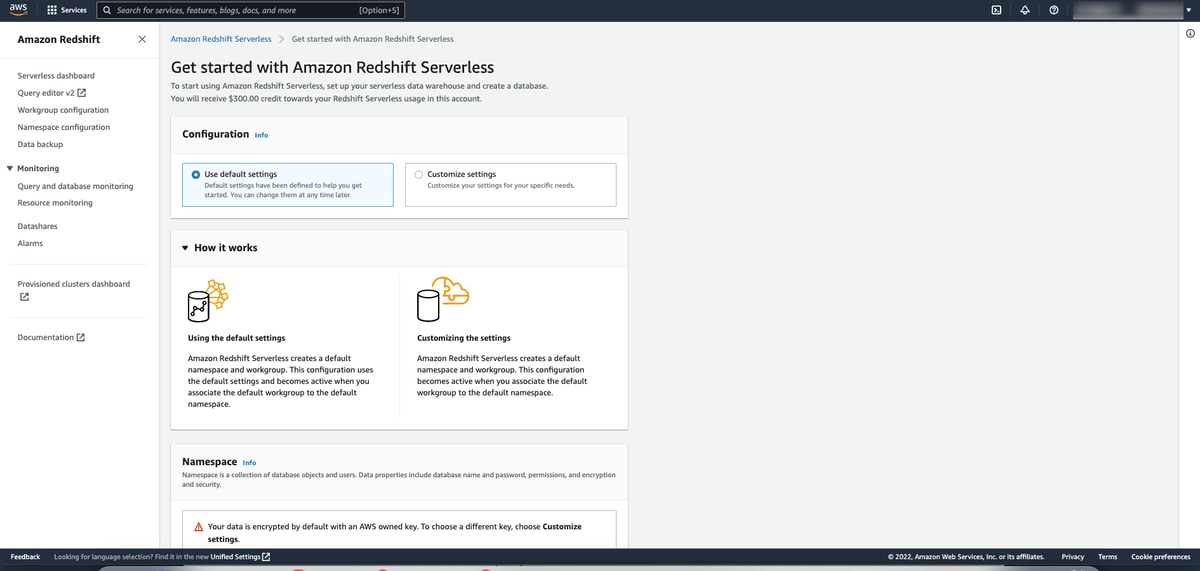
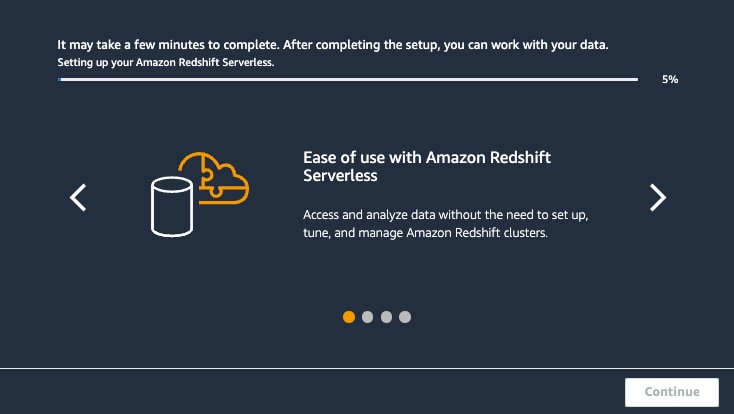
Redshift Serverless will automatically set up your namespace and workgroups (more on that in a moment) along with the IAM roles and other key settings. From there, I experienced very fast background provisioning processes — less than 3 minutes.
No more clusters or nodes
Right out of the gate, you don’t have to deal with provisioning (or tuning or managing) clusters or nodes in RS Serverless. In fact, the RS Serverless dashboard is completely silent on the concept of provisioned clusters. Instead, you’re presented with namespaces and workgroups which are associated together.
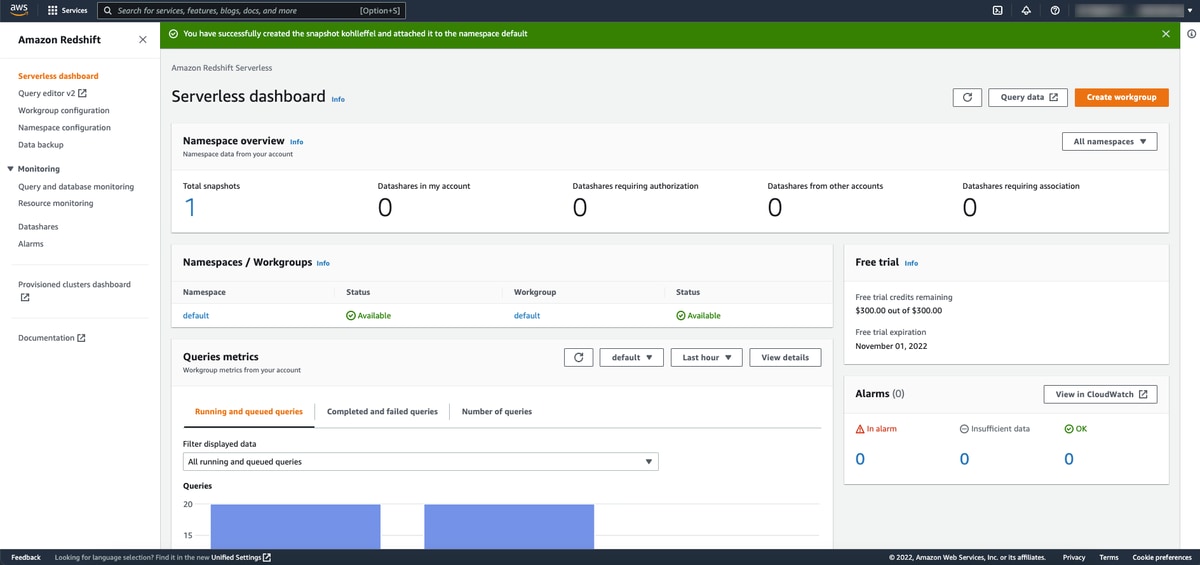
Namespaces and workgroups
Namespaces show all associated workgroups and is the entry point into other options such as managing database objects and users, data backup, security and datashares. You can also view general information about the namespace including the ID, ARN, status, date created, storage used, table count, etc.
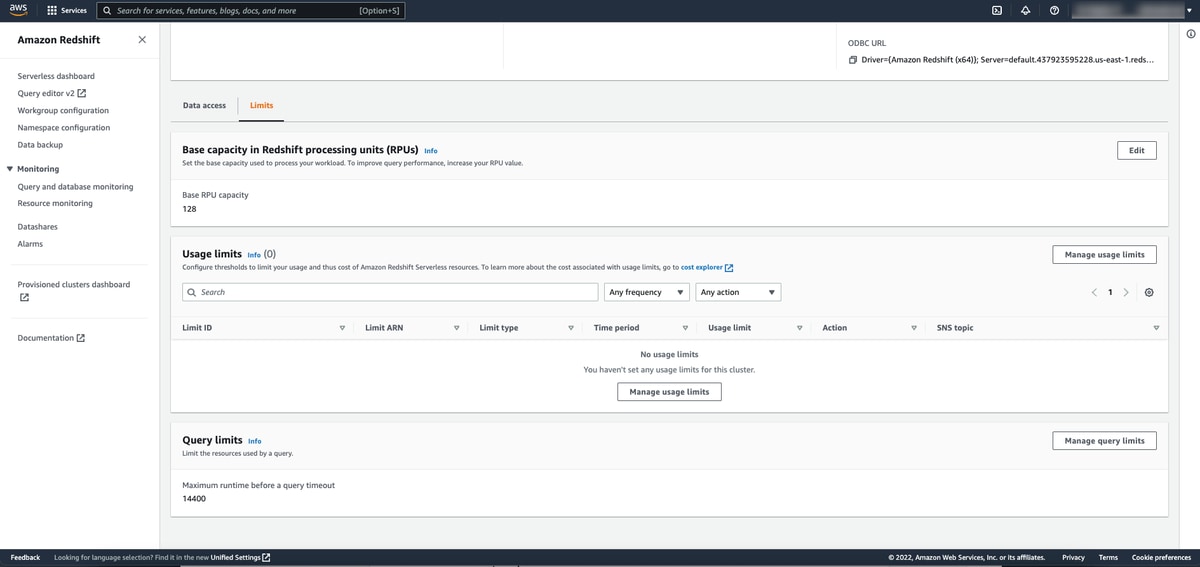
Workgroups, mentioned above, are your window into the compute resources available to you for processing data workloads. Data access options include network and security and VPC endpoint information.
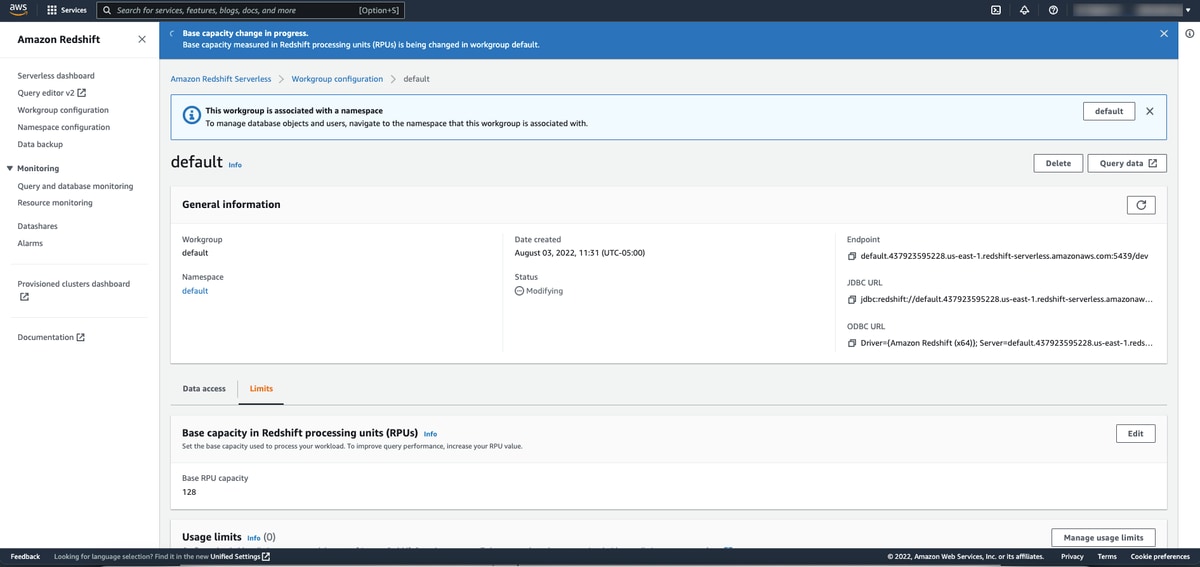
In addition, this is where you can set “Limits” to change the default Redshift Processing Unit (RPU) capacity which is 128 by default but can go from 32 up to 512 in increments of 8. You also configure rules for RPU usage limits (e.g. 1 RPU hour Daily), resources used by queries, and cross-region data sharing.
If you decide to experiment like me and change your RPU base capacity from the default limit, here is what I experienced for wait time while Redshift Serverless was in a “Modifying” status making the change. These changes were not made over the course of a continuous hour so it’s possible that time of day could have some effect. The 512 → 256 change was the fastest at under 4 minutes and that was done after normal US business hours (I’m using the us-east-1 region).
- 64 RPUs → 128 RPUs = 5 min 27 sec
- 128 RPUs → 64 RPUs = 5 min 25 sec
- 128 RPUs → 256 RPUs = 7 min 15 sec
- 32 RPUs → 512 RPUs = 4 min 49 sec
- 512 RPUs → 256 RPUs = 3 min 58 sec
Those RPU change times to grab more processing power are a big improvement over making changes to a provisioned cluster which historically have tended to be in the 30 minutes or more wait time range when performing a cluster resize to add nodes or remove nodes.
The general guidance from AWS is that increasing your RPU base capacity will improve query performance. As it relates to concurrency, Redshift Serverless automatically adjusts resources and scales as needed based on workload activity and the cost control limits that you set as thresholds. Additionally, you don’t need to worry about pausing and resuming (like you do with provisioned clusters) in order to optimize costs since you only pay for Serverless when queries are run.
Whether you left your RPU base capacity at the default (128) or opted to make a change, now it’s time to do some processing so jump into the Redshift Query Editor v2 which you can access from the side menu, the serverless dashboard, the namespace, the workgroup — you get the idea. There’s no problem with options to start running queries.
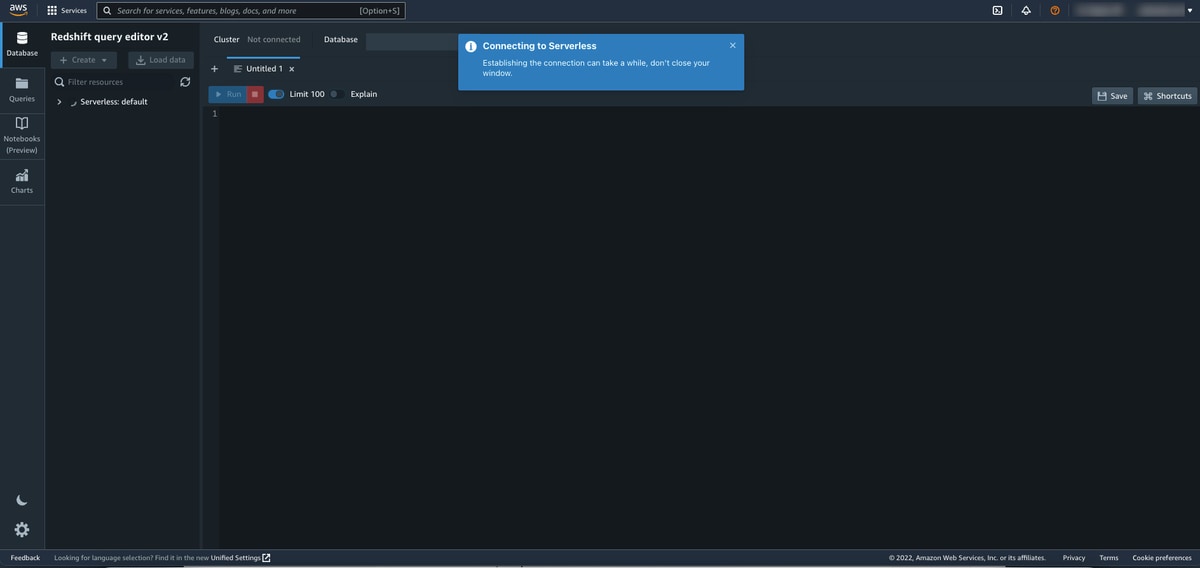
Query editor v2
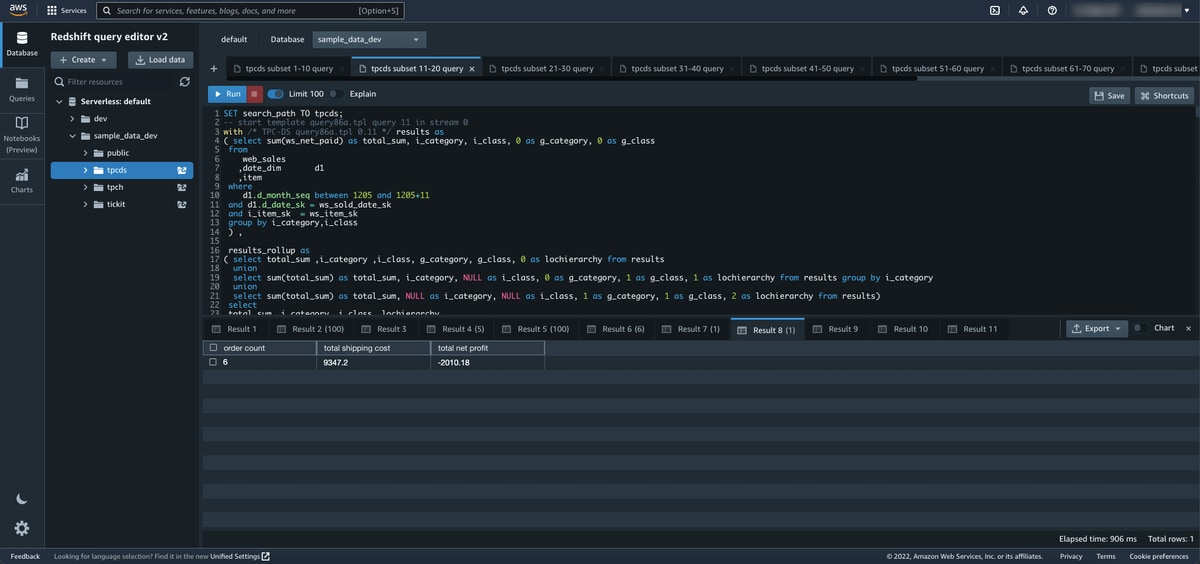
The first time connecting to the Query Editor v2 to Redshift Serverless took about 60 seconds in my case and took just a few seconds each time afterward.Redshift Serverless also starts up a sample database with multiple sample datasets to test and run queries against. I mainly used the sample_data_dev database and the tpcds sample dataset in my initial testing.Redshift Serverless also starts up a sample database with multiple sample datasets to test and run queries against. I mainly used the sample_data_dev database and the tpcds sample dataset in my initial testing.
Redshift Serverless also starts up a sample database with multiple sample datasets to test and run queries against. I mainly used the sample_data_dev database and the tpcds sample dataset in my initial testing.
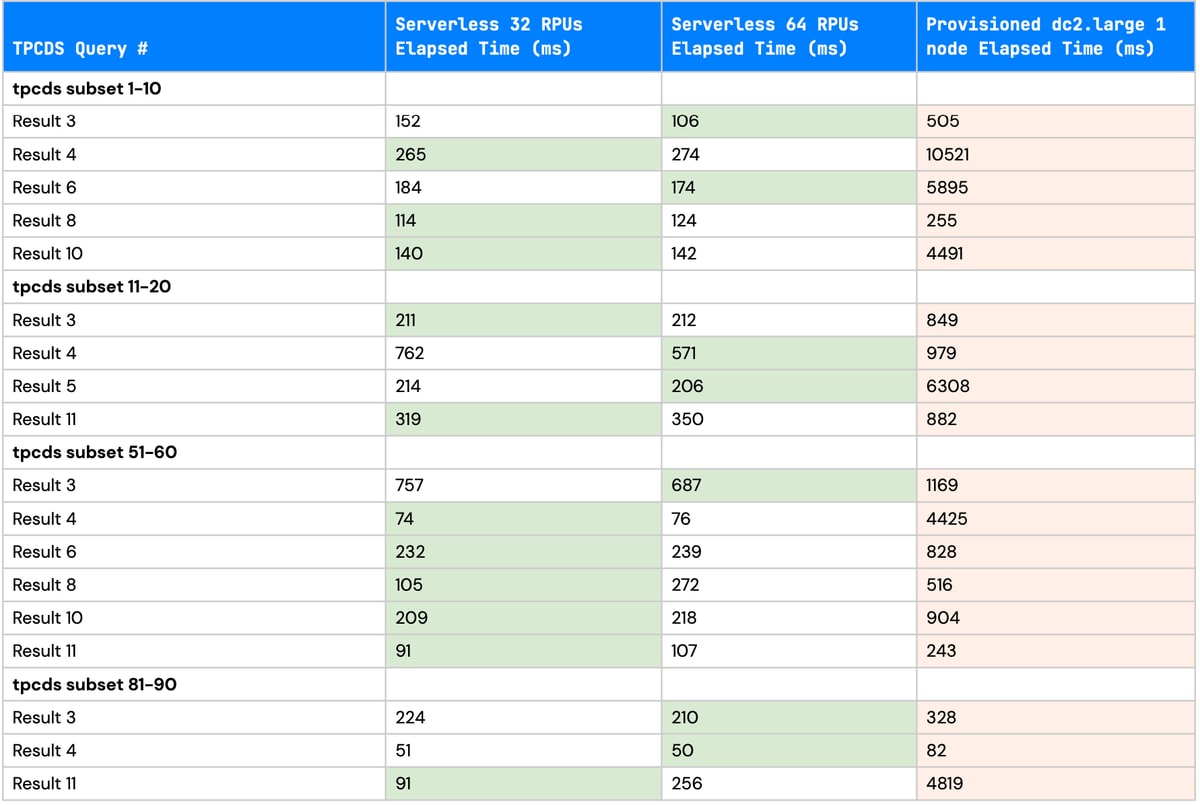
Some initial performance results
I didn’t want the free credits to go to waste, so I opted to do some simple performance testing after making a few RPU changes. Below are the stats from some query runs that I executed on the TCPDS dataset for a 32 RPU and 64 RPU Serverless environment and a Redshift DC2 Large 1 node provisioned cluster.
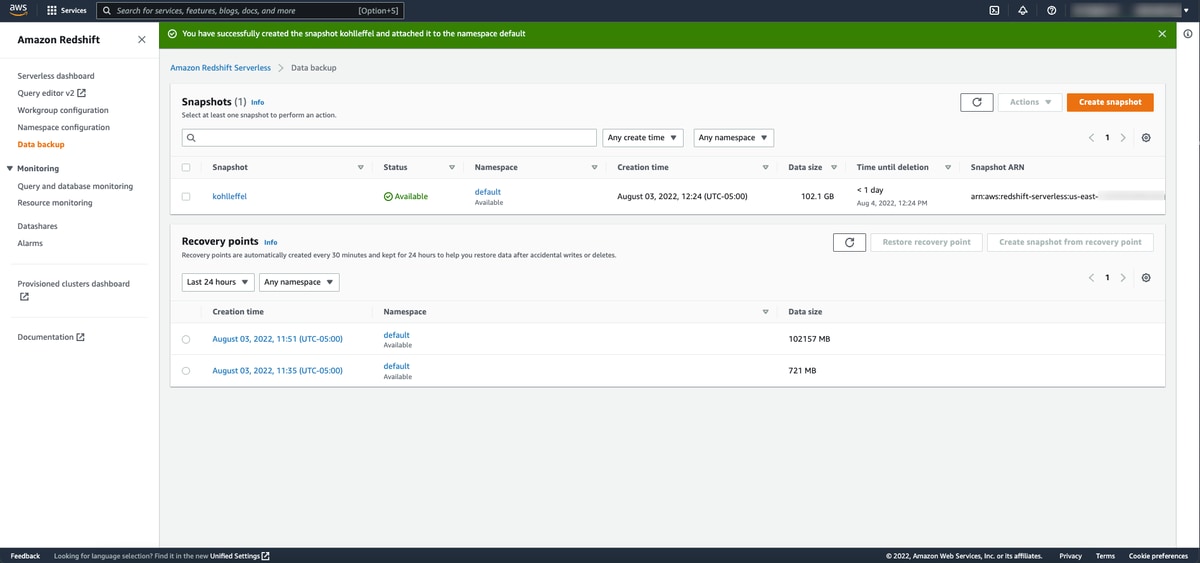
Redshift Serverless snapshots and recovery points
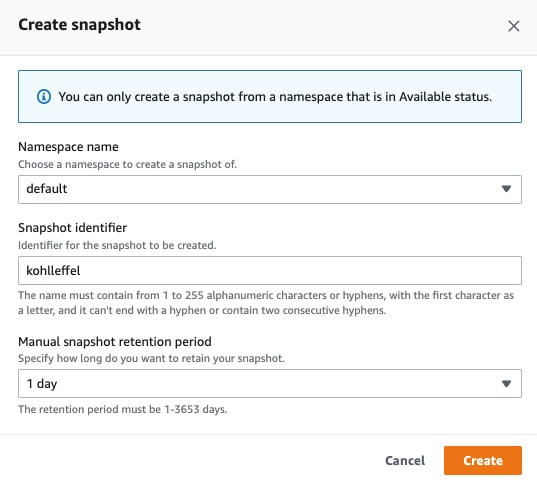
It was also simple to create a snapshot which enables point-in-time backups and can be kept for indefinitely, 24 hours, 7 days, or you can provide your own retention timeframe. To help you restore data after accidental writes or deletes, recovery points are automatically created every 30 minutes — you can restore from a recovery point and create a snapshot from a recovery point.
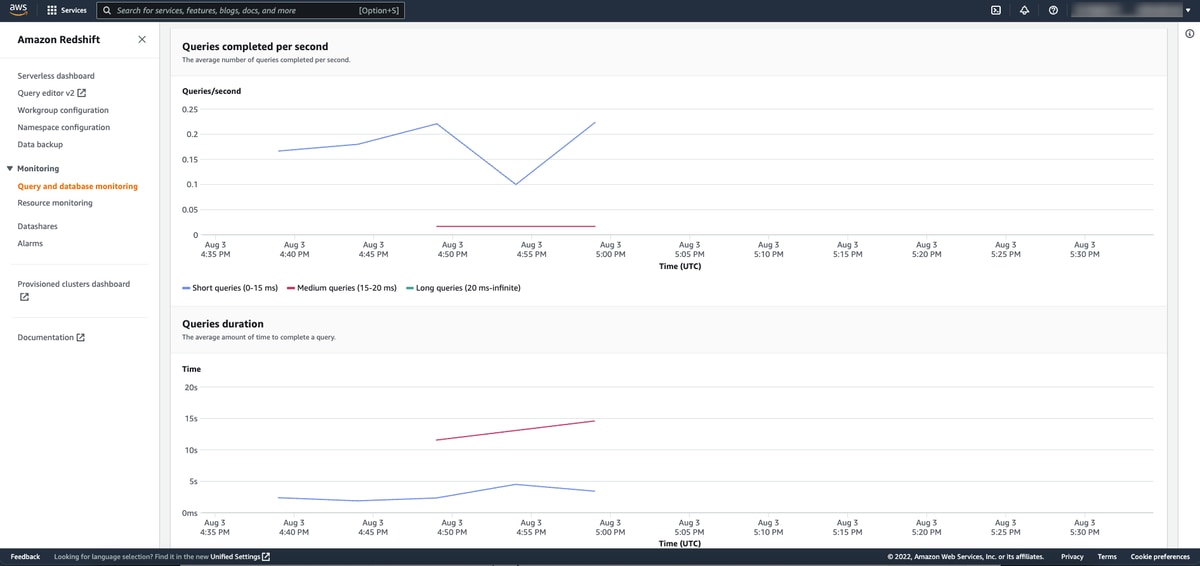
Redshift Serverless monitoring
AWS provides a solid range of out-of-the-box dashboards for insight into how Redshift Serverless is performing. The metrics are broadly grouped into query and database monitoring and resource monitoring.
Query and database monitoring
Select your workgroup, and you’ll have access to the following metrics:
- Query runtime as well as execution details
- RPU capacity used
- Database connections
- Queries completed per second
- Queries duration
- Running queries
- Queued queries
- Query run time breakdown
Note: You can also filter by time range, time interval, databases, queries monitored, SQL commands and users.
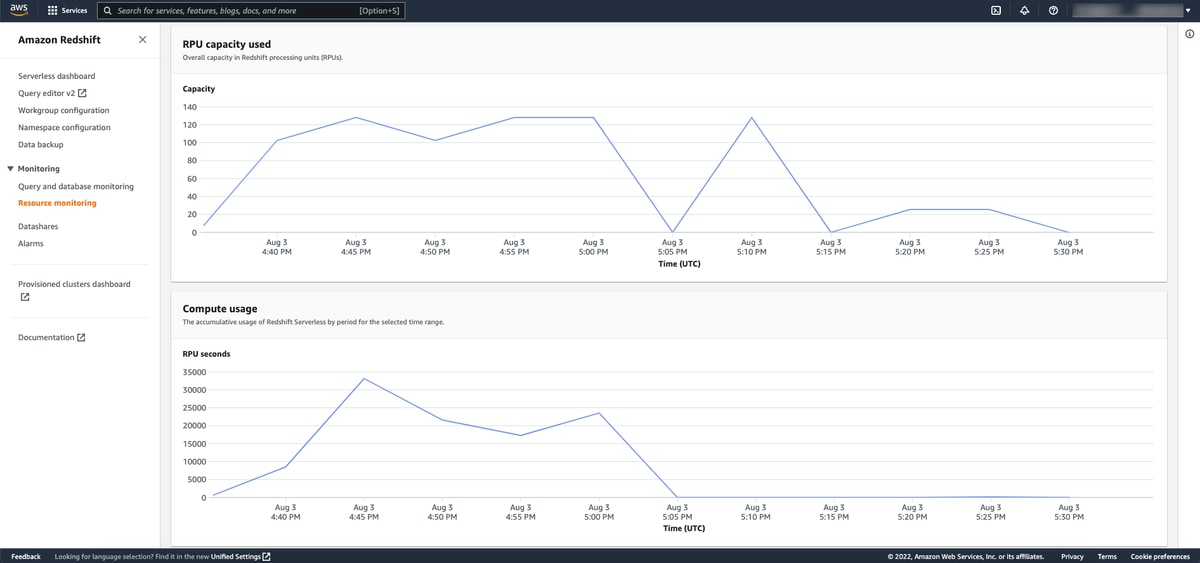
Resource monitoring
For resource monitoring, again, select a specific workgroup and also filter if you like on the time range and time interval to take a look at the following:
- RPU capacity used
- Compute usage
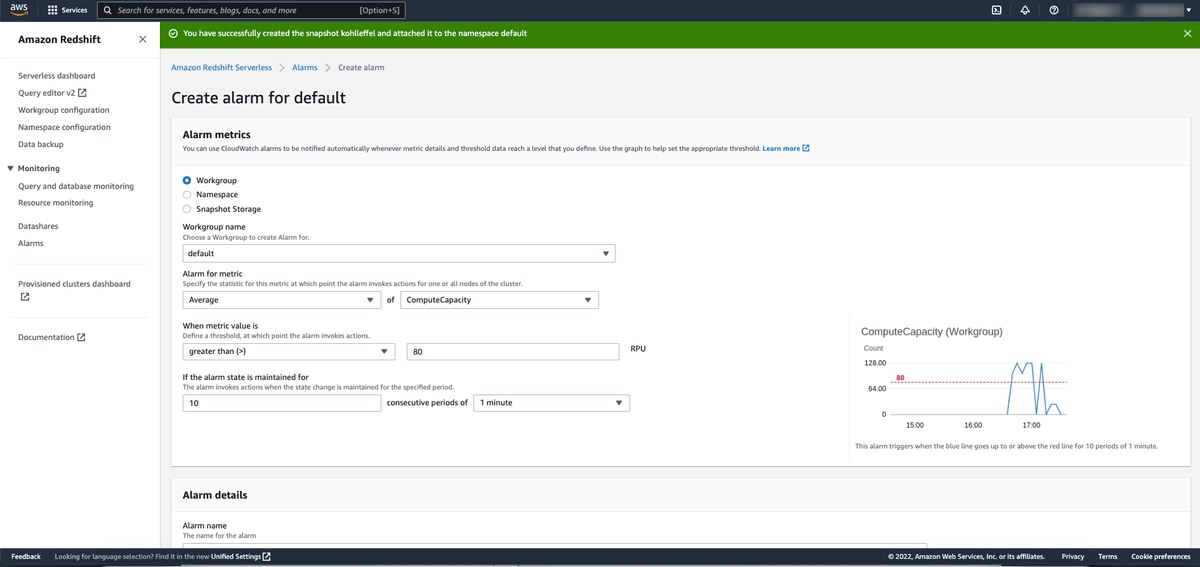
Setting alarms
It’s quick and intuitive to set alarms for a workgroup, namespace or even snapshot storage. I decided to create a new alarm to trigger if the average compute capacity is greater than 80 RPUs.
What about pausing and resuming (and its cost impact)
This was mentioned earlier, but it’s worth repeating as this isn’t possible with a provisioned cluster. I see a big-time benefit in that you only pay for Redshift Serverless when queries are run thereby alleviating the burden of manually pausing and resuming your cluster in order to optimize costs. I know that billing will be based on how much capacity (RPUs) is used during a given timeframe by the second (minimum charge is for 60 seconds, metered on a per-second basis). No queries running = no costs incurred. It’s that simple. Data storage costs still apply as Redshift Managed Storage (GB/Month) and the data volumes stored.
Planning for maintenance, patches, upgrades (or not)
Unlike a provisioned cluster which requires thought and planning for a maintenance window and typical activities such as patching, you don’t have to deal with that at all with Redshift Serverless as those types of activities are handled in the background for you.
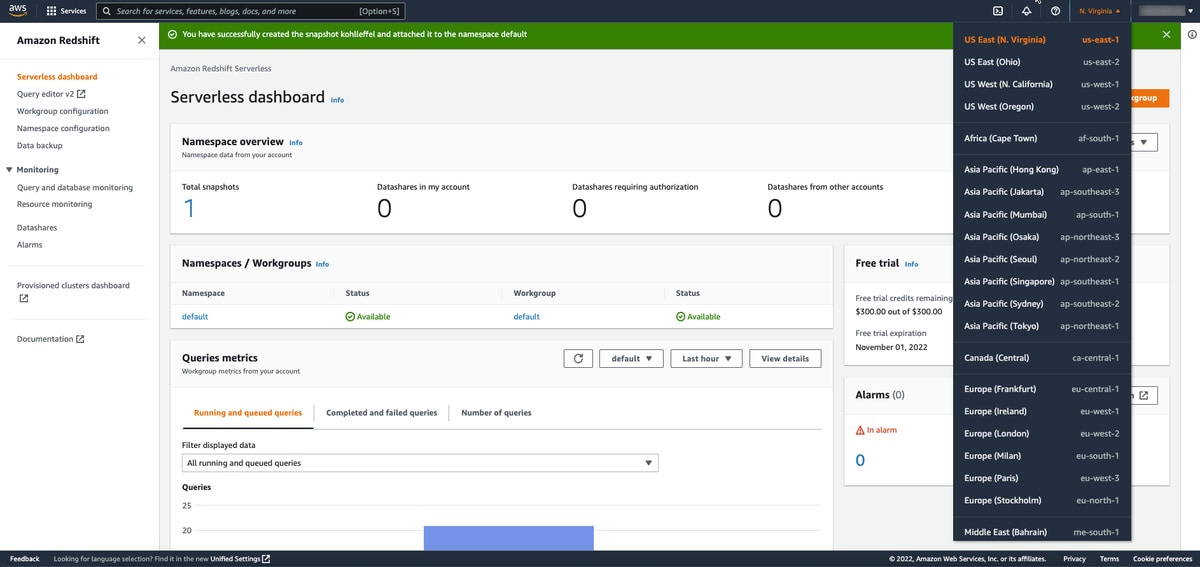
AWS region availability
If you are worried about limited availability in your region, don’t be. Redshift Serverless is available across a wide range of AWS regions in North America, EMEA, and APAC.
Overall impressions
Today’s cloud data platforms have to be simple to use and provide an intuitive user experience while not sacrificing key features and functionality. Additionally, they shouldn’t be a barrier to an organization moving quickly to reduce their ever-growing data product and service backlog. More importantly, they need to be operationally sustainable and not require significant time, effort, energy, people or engineering to constantly optimize them or worry about their uptime or be concerned about a negative cost impact.
During my test drive with Redshift Serverless, it did very well on those key aspects with a UI and overall user experience that I found to be very clean, easy to navigate and pleasing to interact with. I also didn’t have to go through a setup exercise or deal with tuning or cluster management. When I wanted to change my base RPU capacity, it was quick and painless.
I really like the fact that I’m only getting charged when queries are running (paying only for what I use), and there’s no need for me to worry about pause or resume intervention. At the same time, I have an array of limits, alarms and monitoring capabilities at my disposal to set thresholds and corresponding actions.
Areas that I intend to spend more time on over the next quarter or so include gaining a better understanding of the performance impact and cost implications of RPU capacity changes for a given workload, use case or query profile. I also want to explore in detail options for data loading and ingestion and take a closer look at the AWS native service integrations that are available.
I recommend that you take AWS up on the $300 free credit offer and give Redshift Serverless for a spin yourself. I’m betting it’s here to stay.
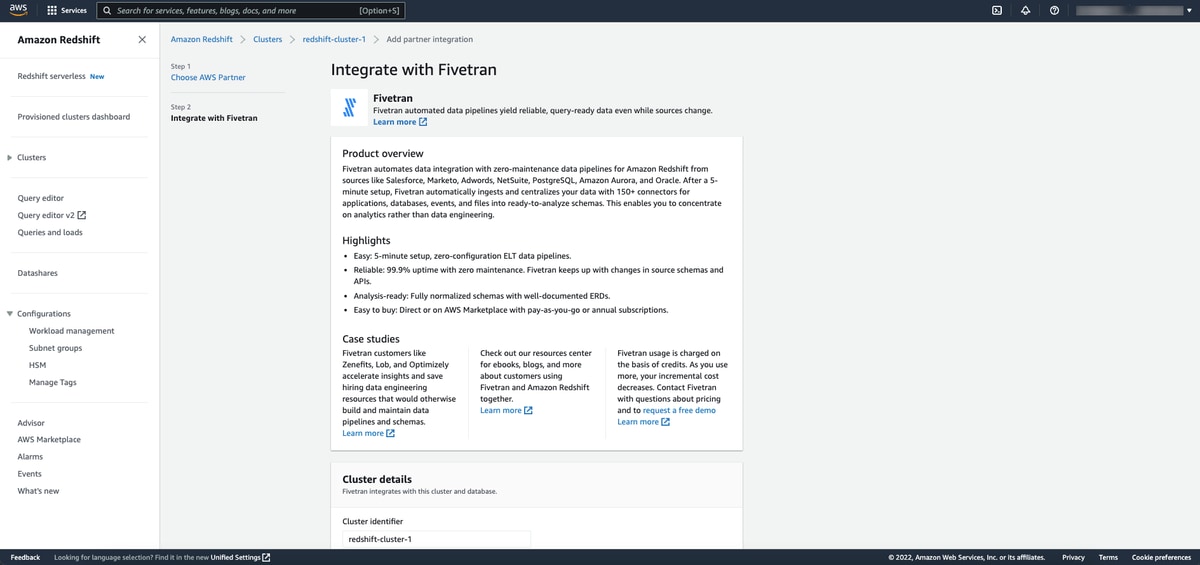
Data movement into AWS and Redshift with Fivetran
Check out this step-by-step guide on how to easily launch Fivetran through the Amazon Redshift console through native integration. Be sure and launch a free 14-day Fivetran trial right from Redshift and start syncing any of your datasets with simple, fast and reliable fully managed and fully automated data pipelines across all of your applications, databases, files and events without writing a single line of code.
If you haven’t checked out Fivetran yet, here’s what you can expect:
- 700+ out-of-the-box data connectors
- Automatic schema management
- Automatic retry logic
- API rate limit intelligence
- Built-in resilience providing 99.9% uptime
- Rapid acceleration for delivery of data and analytics products and services
[CTA_MODULE]
About the author
Kelly Kohlleffel leads the Partner Sales Engineering team at Fivetran, where he collaborates with a broad ecosystem of technology alliances and consulting services partners on modern data stack solutions. He’s been in the data industry for more than 30 years and prior to Fivetran, he spent time at Hashmap, Hortonworks and Oracle. You can connect with Kelly on LinkedIn or follow him on Twitter.
Related blog posts
Start for free
Join the thousands of companies using Fivetran to centralize and transform their data.


